Monday, February 28, 2011

Binky Clips

Items you'll need:
~Clips (either mattress clips, or suspender clips work well too, really wherever you can find them really cheap)
~Ribbon (as wide as the clip)
~Velcro
~Sewing Machine and Thread
First cut the ribbon the size you want the clip to be, then burn the edges to make sure they don't fray.

Then pull the ribbon through, fold it under and sew.
On the other end fold over a little bit and place a small piece of the prickly part of Velcro on top...then sew around all the edges. Make sure to sew the Velcro on the back side that the clip is on.
Then on the same side sew the fuzzy Velcro just a little ways down. I didn't measure or anything...I just figured that I would be able to make a loop around a Binky.
These were super easy, and I think they turned out great!

Friday, February 25, 2011

Yo-Yo Bobby Pins

I can't take the credit for this totally. I saw it at some store....but figured I could figure out how to make them pretty darn simple. First you make a fabric Yo-Yo using THIS tutorial. I normally don't iron down the edges before sewing the edges because I like the more tattered look.

Then you'll Need:

~Bobby Pins
~Felt
~Hot glue gunCut thin strips of felt and put through the bobby pin on one side....so you'll be able to fold the felt in half. Put a dab of glue on top of the bobby pin and on the side then fold felt in half!
Then put another dab of glue on top of that...then add your Yo-Yo!
It's as simple as that!! And look how cute and easy they are!

Wednesday, February 16, 2011

Chalkboard Message!


I thought this would be a fun way to leave messages to each other. I took a wooden 12X12 piece I found at JoAnns and took scraps of paper and mod podged them onto the wood. I measured a square in the middle and made sure that I didn't put paper inside that square so that I could put the chalkboard paint on. It worked out pretty good, and so far it's been pretty fun!

Tuesday, February 15, 2011

Heart Attack

Our front door got heart attacked! Well...just by us! I cut out a ton of hearts on my Cricut, then we wrote what we loved about each other on them! I love it!

Monday, February 14, 2011

Valentine Decor

I found these frames in my craft room and used my Cricut to cut out hearts and Love. Then I just put them in how I liked it and put it up in my house!
I did the same with this frame. Plus I found this cute red pot at Savers and put these flowers in it and used vinyl to put the XOXO on it.

Sunday, February 13, 2011

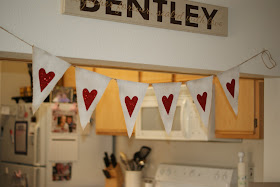
Burlap Valentine's Banner

Here is another way fun way easy Valentine's project!

Items:
1/2 yard Burlap
Hemp rope
Glitter scrapbook paper
White spray paint
Hot glue gun
white paper
scissors

1. Cut out of white paper the size and shape you want your banner to be. This will be your template.

2. Cut out burlap.

3. Spray paint each triangle with the white spray paint.

4. Cut out glitter scrapbook paper heart.

5. Hot glue each heart to burlap after the paint has dried.

6. Hot glue each triangle to a long sting of hemp rope by folding the top over the rope. Then trim the edges.


Enjoy!

Saturday, February 12, 2011

Valentine Subway Art

We found this super fun Subway art idea HERE at Eighteen25. She has a printout you can just send to Costco, but we decided to make our own using her idea. My friend is awesome using Photoshop, so the 3 of us threw out cute sayings and helped to design it! It was a fun project. We found the frames at Savers and spray painted them white. That's when we decided what size we were going to make the print. We ended up doing an 8X20. I think this is one of my favorite projects that we did!

Friday, February 11, 2011

Conversation Heart Pillows

I saw this idea HERE and thought it was so fun! I've been loving the whole Valentine day decor this year! Sweetie Pie Bakery has a great tutorial for these. I just printed out the letters using word and then cut those out to make the template. It took a while, but I think they turned out super fun!

Thursday, February 10, 2011

Conversation Hearts Blocks

I found this idea HERE at Brown Paper Packages. I love that Home Depot will cut 2X4's for you! I also love that they have the wood scrap bin! Cheap and easy!!

We first sanded the wood down, and then painted them the colors we liked. On the website they painted to different colors on each block to have a fun tint to it, but we just decided to do the one color. Then we cut out the letters using our Cricut and vinyl. Once the paint dried we sanded the edges down and then placed the vinyl on. It was a super easy and fun Valentine craft!
Enjoy!

Valentine Wreath

I found this one at HERE at The Idea Room with the tutorial. I thought it was so fun and cute that I had to make it! Here is the final product!